
12 Important Customer Service Skills in 2024
Excellent customer service has always been, and always will be, essential for any company's success. Here are the 12 most important customer service skills.
Read nowAt our last webinar, which we incidently do for free every Tuesday at 11 am est, I had a few questions about manipulating metadata. You can manipulate them in many ways in Razuna. On a single asset, you can of course go to the asset details window and edit the metadata. Save — and go. You can add your own custom fields from the admin section and edit the values , you can add labels or you can edit all the standard metadata such as description, keywords, XMP and IPTC metadata.
That’s easy and quickly done.
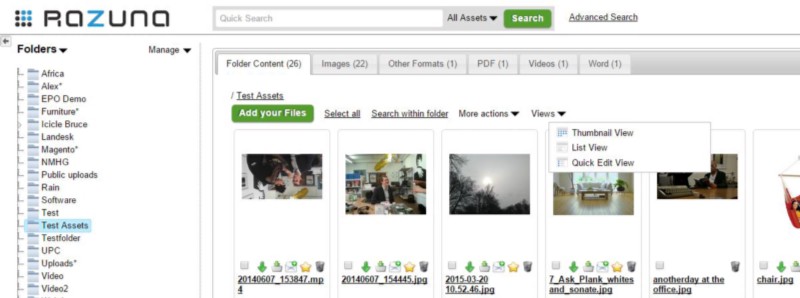
Now, if you want to manipulate the metadata for multiple assets, you have a few interesting options. You can either select the quick-edit mode and edit the most important metadata for all assets in a folder. And with the quick-edit view, you can do that straight from the folder overview.
You access the quick-edit from the Views drop-down. See below:
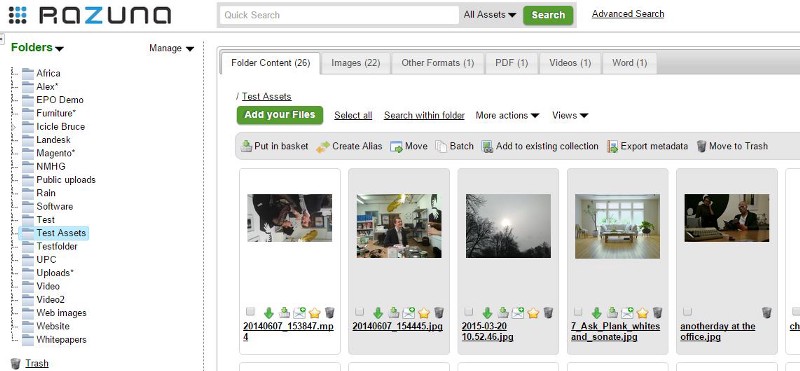
You can also run a batch, where you update the metadata for multiple assets quickly. Simply select the assets you want to edit and you will see the batch button appearing on top of the assets like below.
But imagine you need to manipulate metadata for hundreds or thousands of assets. In this case, running a batch or quick-edit may not be very easy. So for this process, we have created a metadata export. You can either pxport the metadata for the selected files. As you can see below, the “Export metadata” button automatically appears, when you have selected assets. The same can be done from the basket.
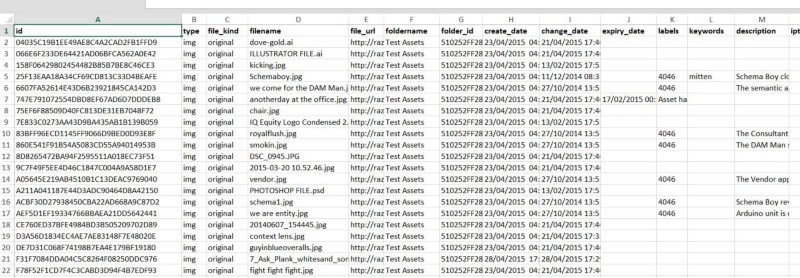
You can also simply click on “More actions” and then select “Export Metadata”. In this case, Razuna prompts you whether you want to export for all assets in folder or for all assets in Razuna. Next, you can decide whether you want to export in CSV, XSL or XLSX format. Finally, you can even choose to add the renditions in the export. Click ok, and you will download a nice file, which you can edit directly in your favorite spreadsheet (mine is Excel). All fields are present, and via the spreadsheet, you can move to different folders, add (and even create labels), add keywords etc. The spreadsheet looks like spreadsheets do, but I have pasted a screendump of mine below.
Once you have finished editing the spreadsheet, you simply go to More Actions again and this time you select “Import metadata” (I’m sure you’d figured that out already). Import into the folder or all of Razuna, and your assets are updated.
This is a super simple way of making sure that the quality of the assets you have uploaded during the on-boarding process. You can also use the feature to keep the quality of metadata intact at all times.
Enjoy!
Excellent customer service has always been, and always will be, essential for any company's success. Here are the 12 most important customer service skills.
Read now
Email delegation can reduce the burden on team members and spread the workload. Our guide to email delegation with a shared inbox will provide the answers.
Read now
Google Collaborative Inbox is a free inbox collaboration tool you can access by turning on Groups For Business. But does this Google feature have what it takes?
Read now
Automated customer service is a game-changer for businesses. Learn about the benefits, examples, and strategies for implementing automated customer service.
Read now
Empower your team and delight your customers.

